
Connect Zoho Invoice with your apps using Konnectify
With Zoho Invoice and Konnectify integration, you can connect your Zoho Invoice account to 100+ applications such as QuickBooks, Stripe, ZohoCRM, etc, and automate your workflows.
You can:
- Make payments using Zoho Invoice
- Create, Update, Send, and Delete invoices using Zoho Invoice
- Contact, Project, Item, and Estimation can be created or updated in Zoho Invoice
- Retrieve Contacts, Payments, and Invoices
Why connect with Konnectify?
- Sync payments recorded in Zoho Invoice with QuickBooks to maintain accurate financial records
- Create or update customer profiles in Stripe when new contacts are added or existing ones are modified in Zoho Invoice.
- Send invoice through Zoho Invoice for every new order made through Shopify
To get started, create an account at https://www.zoho.com/in/invoice/signup
Getting started
New to Konnectify? To get started, follow these instructions.
Create a Konnectify Account:
- Head to the Konnectify website - https://www.konnectify.co/
- New customers can click the "Get Started for Free " button on the website to create a Konnectify account or sign up from here.
(Register with your email address or use Google or Microsoft accounts for SSO Login.) - Existing customers can click on the “Login” button.
Once the process is complete, you can follow the steps to build your first Konnector.
Adding your Zoho Invoice account on Konnectify
Once you have set up your Konnectify account, connect your Zoho CRM account. On your Konnectify dashboard,
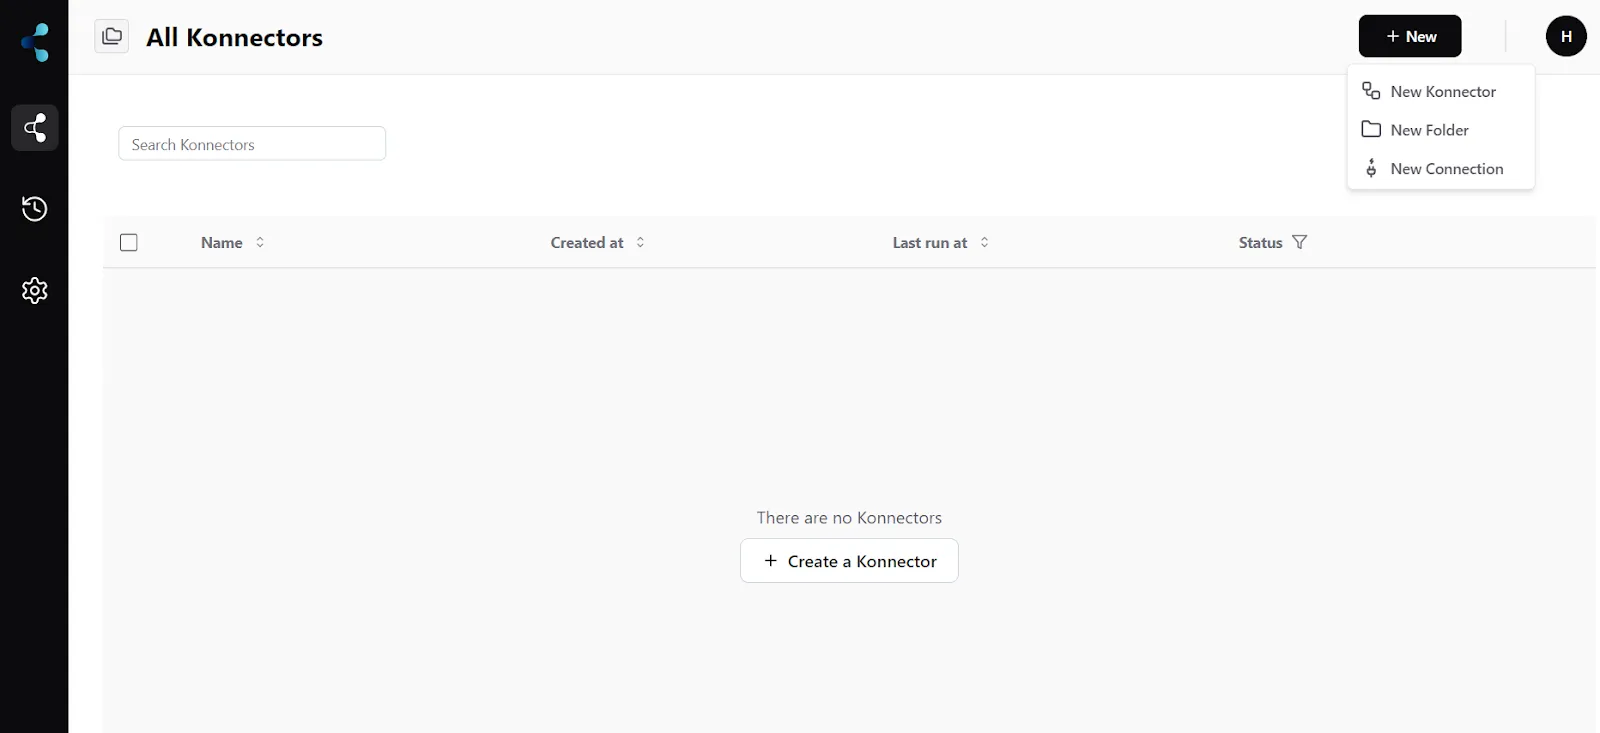
- On the top right, click on + New >> New Connection.
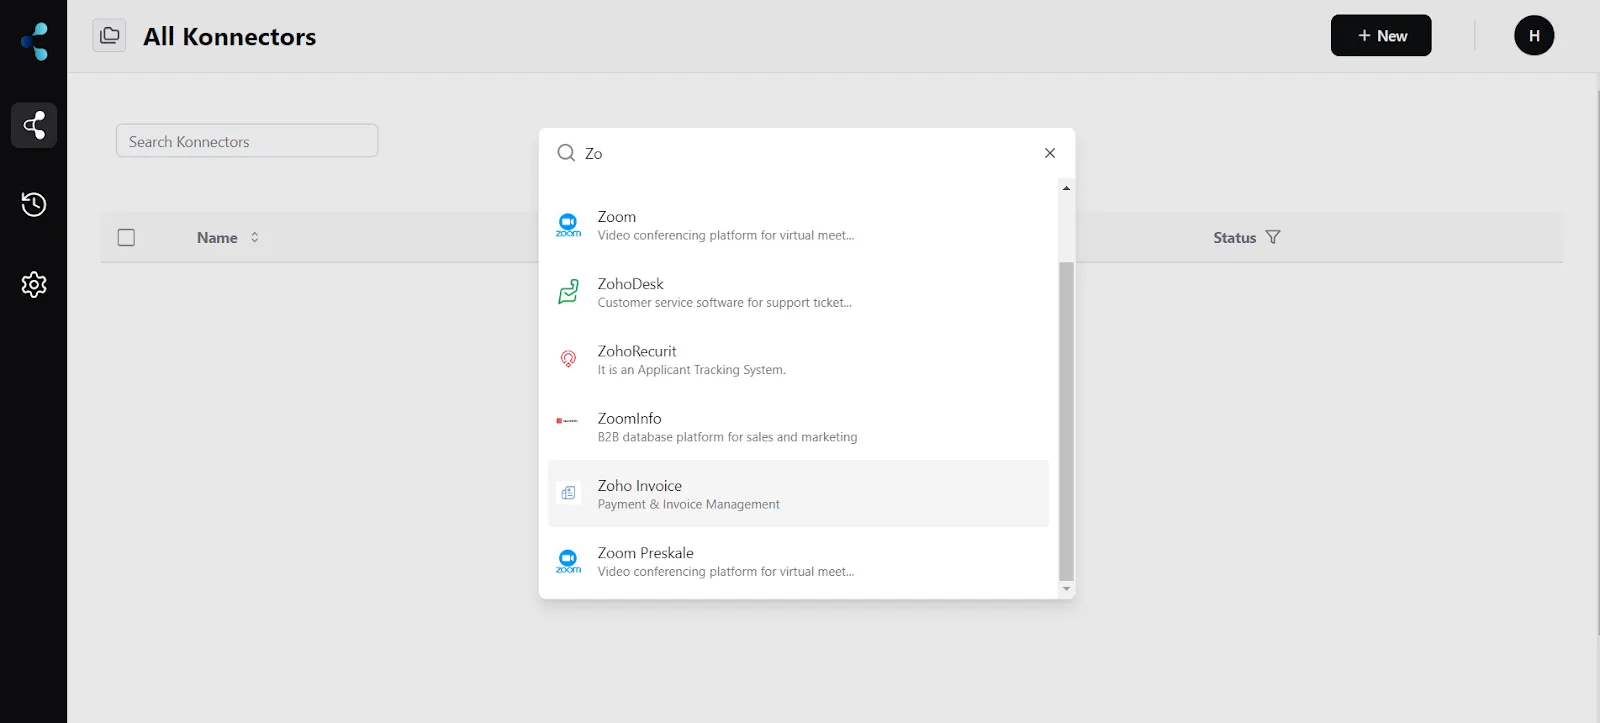
2. Select "Zoho Invoice" from the dropdown.
3. You will need to enter your Zoho Invoice app credentials:
Connection Name ( Your preferred name)
Region ( Based on your Datacenter)
- Click "Validate your account" to test the connection and then save your account.
Create a new Konnector
Let’s take the example that for every order made in Shopify you can send invoices using the Zoho Invoice platform.
Step 1: Create a new Shopify trigger
- On the top right, click on + New >> New Konnector.
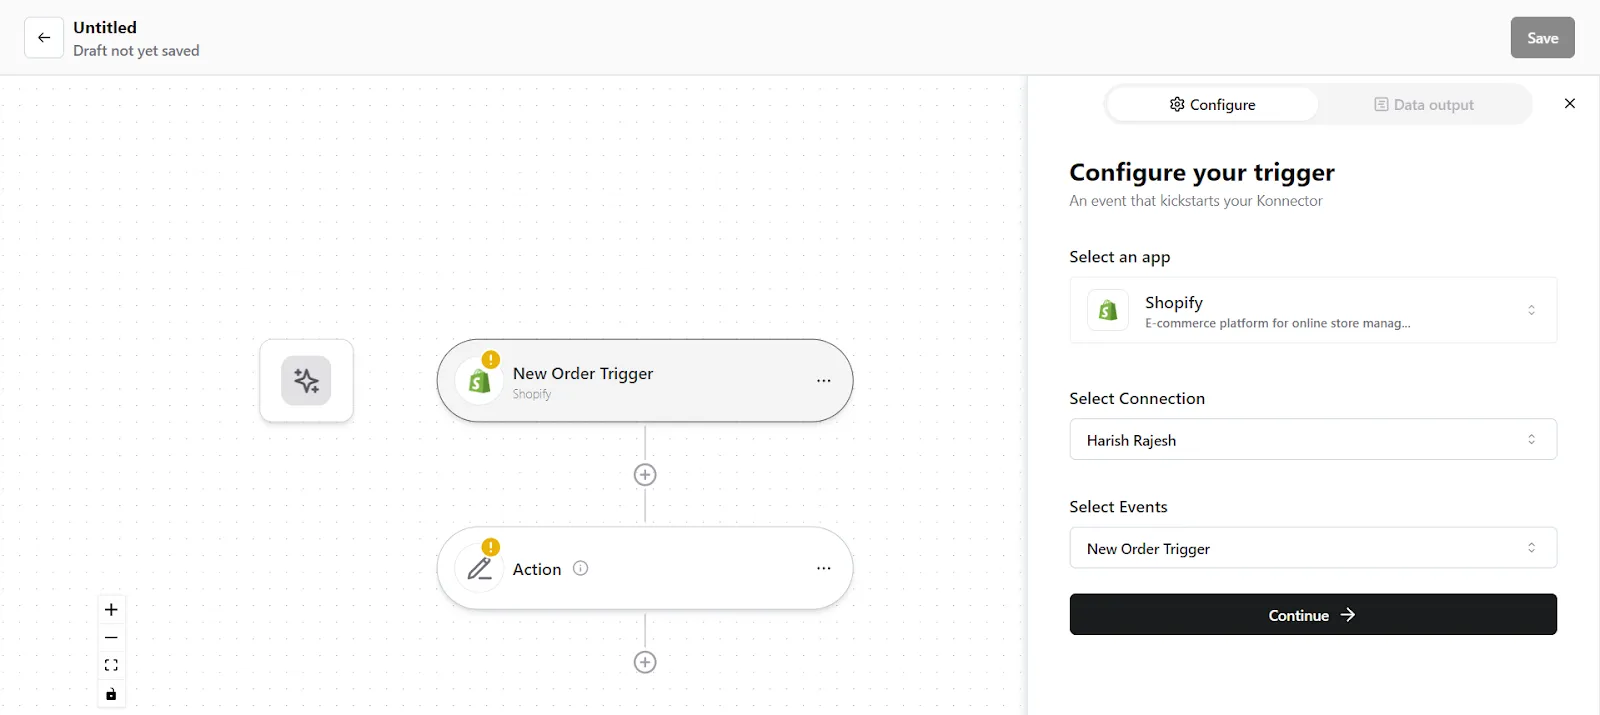
- Select "Shopify" as the Trigger app.
- If you have not connected to Shopify earlier, you will be prompted to enter your Shopify account details. Validate your account and then save it.
- Select the account you want to fetch a new order from if you already have an account.
- Select the trigger event as "New Order"
6. Click on "Trigger output fields" to fetch a sample order from Shopify.
7. Once you have fetched a sample order, click "Save configuration".
Step 2: Create a new Action
- On your Konnector page, click on " Action".
- Select "Zoho Invoice" app.
- Select the Zoho Invoice account you added earlier.
- Select the event as "Send Invoice".

- You now have to map the data. You can do this in 2 wayssome text
- Map custom attributes via Source. You can map fields from earlier triggers or searches. Select the trigger from which you want to map this value.
- Map custom attributes via Fixed. If you want to map a fixed value, select this option and enter the value that you want to map.
Step 3: Save your Konnector
Once you have set up your Konnector, give it a name (For example: For every new order, send an invoice using Zoho Invoice) and click on "Save". This will enable this Konnector:
Now, Whenever an order is made in Shopify, you can send an invoice using Zoho Invoice automatically.
Frequently Asked Questions (FAQs)
What are triggers?
Triggers kick off your Konnector or workflow. You can initiate your workflow with this trigger, as it acts as the starting point for any conditional logic or actions you set up. Example: New Order made in Shopify
What are actions?
Once you have set up a trigger, the action can be what you want the outcome to be. Example: Send Invoice using Zoho Invoice
What are searches?
Searches let you retrieve or extract information and data from applications. You can pull information based on specific criteria to make your workflow more efficient.